
Deploying Docker Applications to Amazon EKS
Add a Deploy to Kubernetes stage that writes a Deployment and a LoadBalancer Service, applies them to EKS from Jenkins, and open the running application through the AWS load balancer.
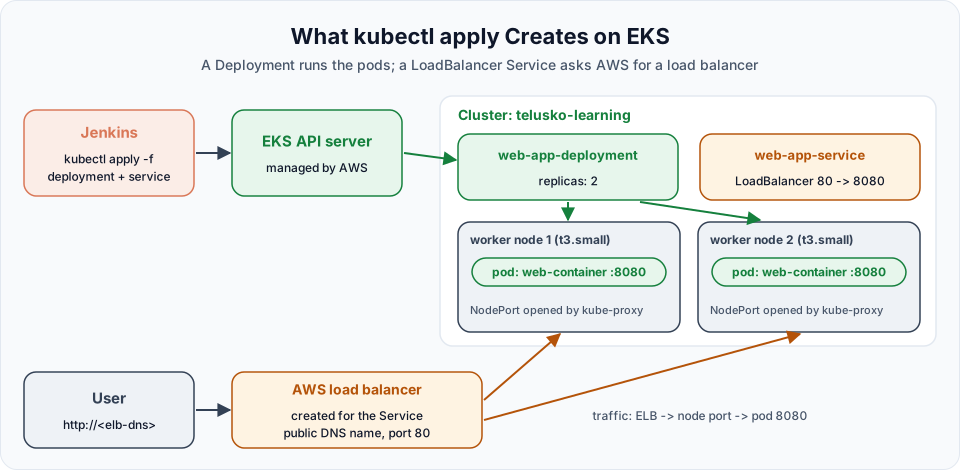
The image is on Docker Hub. Nobody can use it yet. The last step is to tell Kubernetes: "run two copies of this image and give users a way to reach them". In Kubernetes you say that with YAML manifests, and Jenkins sends them to the cluster with kubectl apply.
By the end of this lesson, one click on Build Now takes the code from GitHub all the way to a URL you can open in the browser.
Step 1: make sure Jenkins is allowed into the cluster
The lecture starts by giving the Jenkins IAM role an EKS access entry with cluster admin rights. Whether you need this depends on how your cluster was created, so check first. On the EKS home server:
aws eks describe-cluster --name telusko-learning --region ap-south-1 \
  --query 'cluster.accessConfig.authenticationMode' --output text

aws eks list-access-entries --cluster-name telusko-learning --region ap-south-1- If the mode is
APIorAPI_AND_CONFIG_MAP(eksctl's default) and the list already containsarn:aws:iam::<account-id>:role/eks-telusko-learning, you are done. That entry was created automatically for the identity that created the cluster, and the Jenkins server uses the same role. - If the role is not in the list (for example, you created the cluster with an IAM user, or Jenkins uses its own role), create the entry and give it permissions, exactly as in the video:
aws eks create-access-entry \
  --cluster-name telusko-learning \
  --principal-arn arn:aws:iam::<account-id>:role/eks-telusko-learning \
  --region ap-south-1

aws eks associate-access-policy \
  --cluster-name telusko-learning \
  --principal-arn arn:aws:iam::<account-id>:role/eks-telusko-learning \
  --policy-arn arn:aws:eks::aws:cluster-access-policy/AmazonEKSClusterAdminPolicy \
  --access-scope type=cluster \
  --region ap-south-1
If the role already has an entry, the first command fails with ResourceInUseException. That is harmless and means the entry exists. Find your account ID with aws sts get-caller-identity --query Account --output text, and never paste it into public screenshots or forums.
AmazonEKSClusterAdminPolicy with type=cluster gives full control of the whole cluster, which is fine for a practice cluster. For a real Jenkins identity, use AmazonEKSEditPolicy scoped to the namespaces it deploys to, as shown in Configuring Jenkins to Connect with Amazon EKS.
Step 2: free some disk on the Jenkins server
The previous pipeline left images behind. The lecture clears them before continuing:
sudo docker system prune -aType y to confirm. This deletes every image not used by a running container, which is fine on a practice server. Do not run it on a shared build server where other jobs rely on cached images.
Step 3: add the Deploy to Kubernetes stage
The lecture renames the pipeline-docker job to complete-cicd-pipeline (job page > Rename) and adds one more stage. The stage writes two YAML files and applies them.
Here is the full pipeline, building on the version from the previous lesson:
pipeline {
    agent any

    environment {
        DOCKERHUB_USER = 'your-dockerhub-username'
        IMAGE_NAME     = "${DOCKERHUB_USER}/my-web-app-telusko"
        IMAGE_TAG      = "${BUILD_NUMBER}"
    }

    tools {
        maven 'maven'
    }

    stages {
        stage('git clone') {
            steps {
                git branch: 'main', url: 'https://github.com/Haider7214/webapp.git'
            }
        }

        stage('maven build') {
            steps {
                sh 'mvn clean package'
            }
        }

        stage('Build Docker Image') {
            steps {
                writeFile file: 'Dockerfile', text: '''
FROM tomcat:10.1-jdk17-temurin
LABEL maintainer="Telusko"
EXPOSE 8080
COPY target/web-app-0.0.1-SNAPSHOT.war /usr/local/tomcat/webapps/ROOT.war
'''
                sh 'docker build -t $IMAGE_NAME:$IMAGE_TAG -t $IMAGE_NAME:latest .'
            }
        }

        stage('Docker Push') {
            steps {
                withCredentials([usernamePassword(credentialsId: 'dockerhub-creds',
                                                  usernameVariable: 'DOCKER_USER',
                                                  passwordVariable: 'DOCKER_PASS')]) {
                    sh '''
                        echo "$DOCKER_PASS" | docker login -u "$DOCKER_USER" --password-stdin
                        docker push $IMAGE_NAME:$IMAGE_TAG
                        docker push $IMAGE_NAME:latest
                    '''
                }
            }
        }

        stage('Deploy to Kubernetes') {
            steps {
                // Kubernetes Deployment: two copies of the app
                writeFile file: 'deployment.yaml', text: """
apiVersion: apps/v1
kind: Deployment
metadata:
  name: web-app-deployment
spec:
  replicas: 2
  selector:
    matchLabels:
      app: web-app
  template:
    metadata:
      labels:
        app: web-app
    spec:
      containers:
      - name: web-container
        image: ${IMAGE_NAME}:${IMAGE_TAG}
        ports:
        - containerPort: 8080
"""
                // Kubernetes Service: an AWS load balancer in front of the pods
                writeFile file: 'service.yaml', text: '''
apiVersion: v1
kind: Service
metadata:
  name: web-app-service
spec:
  type: LoadBalancer
  selector:
    app: web-app
  ports:
  - protocol: TCP
    port: 80
    targetPort: 8080
'''
                sh 'kubectl apply -f deployment.yaml'
                sh 'kubectl apply -f service.yaml'
                sh 'kubectl rollout status deployment/web-app-deployment --timeout=180s'
            }
        }
    }

    post {
        always {
            sh 'docker logout || true'
            sh 'docker rmi $IMAGE_NAME:$IMAGE_TAG $IMAGE_NAME:latest || true'
        }
    }
}
Reading the manifests
| Field | Meaning |
|---|---|
kind: Deployment, replicas: 2 | Keep two pods running at all times. If one crashes or its node dies, Kubernetes starts a replacement |
selector.matchLabels and template.metadata.labels | Both say app: web-app. That is how the Deployment knows which pods belong to it. They must match |
image: ${IMAGE_NAME}:${IMAGE_TAG} | The exact image this build pushed, for example user/my-web-app-telusko:12. The lecture used :latest here |
containerPort: 8080 | Tomcat listens on 8080 inside the container |
kind: Service, type: LoadBalancer | Ask the cloud for an external load balancer. On EKS, AWS creates one and gives it a public DNS name |
selector: app: web-app | Send traffic to every pod with this label |
port: 80, targetPort: 8080 | Users connect to port 80 on the load balancer; traffic reaches port 8080 in the pods |
The Deployment YAML uses triple double quotes (""") so Groovy fills in ${IMAGE_NAME} and ${IMAGE_TAG}. That is safe here because these values are not secrets. The Service uses single quotes because it has nothing to fill in.
Why the build number in the manifest matters: kubectl apply only changes what is different. If the Deployment always says :latest, the second run of the pipeline sends an identical manifest, Kubernetes sees "unchanged", and the old pods keep running the old code even though Docker Hub has a new image. A new tag on every build changes the pod template, so Kubernetes rolls out the new version. We look at this rollout closely in the next lesson.
kubectl rollout status is not in the lecture. Without it, the stage turns green as soon as Kubernetes accepts the manifest, even if the new pods then fail to start. With it, Jenkins waits until the new pods are ready and fails the build if that does not happen within 180 seconds.
For a refresher on these objects see Kubernetes Deployments and LoadBalancer Service Explained.
Step 4: run it and open the app
Click Build Now. The stage view gains a sixth column:
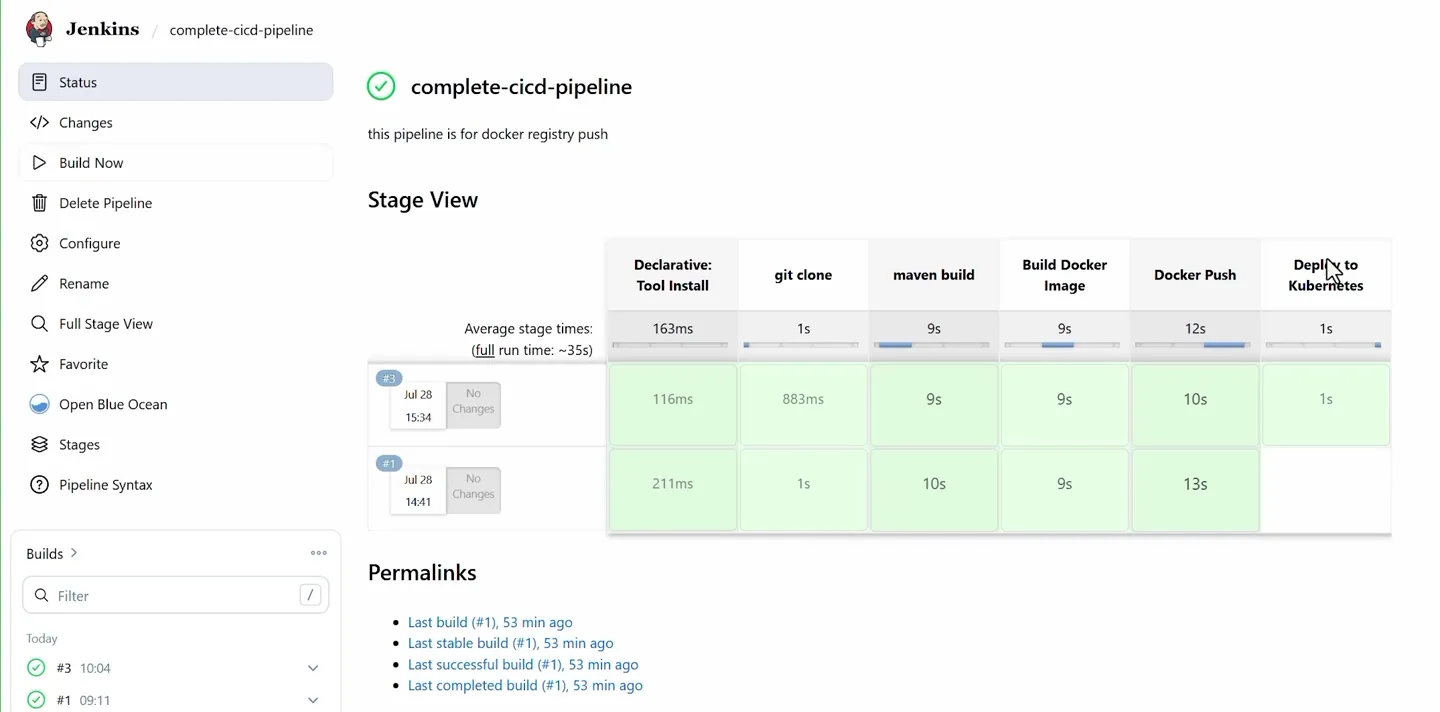
Build #3 ran all six stages. The older build #1 stopped at Docker Push because the deploy stage did not exist yet.
Check the result from the EKS home server (or from the Jenkins server with sudo -u jenkins):
kubectl get pods
kubectl get svc
NAME READY STATUS RESTARTS AGE
web-app-deployment-768f86d9c4-4n5wz 1/1 Running 0 41s
web-app-deployment-768f86d9c4-q8fqw 1/1 Running 0 41s
NAME TYPE CLUSTER-IP EXTERNAL-IP PORT(S) AGE
kubernetes ClusterIP 10.100.0.1 <none> 443/TCP 179m
web-app-service LoadBalancer 10.100.238.219 a0900be...ap-south-1.elb.amazonaws.com 80:30315/TCP 47sThe EXTERNAL-IP column holds the load balancer's DNS name. You can also find it in the AWS console under EC2 > Load Balancers: a new load balancer of type classic appears, created by Kubernetes for the Service.
Open http://<that-dns-name> in the browser. Use http, not https. A brand new load balancer needs one to three minutes before DNS resolves and the health checks pass, so if the page does not load at first, wait and refresh.
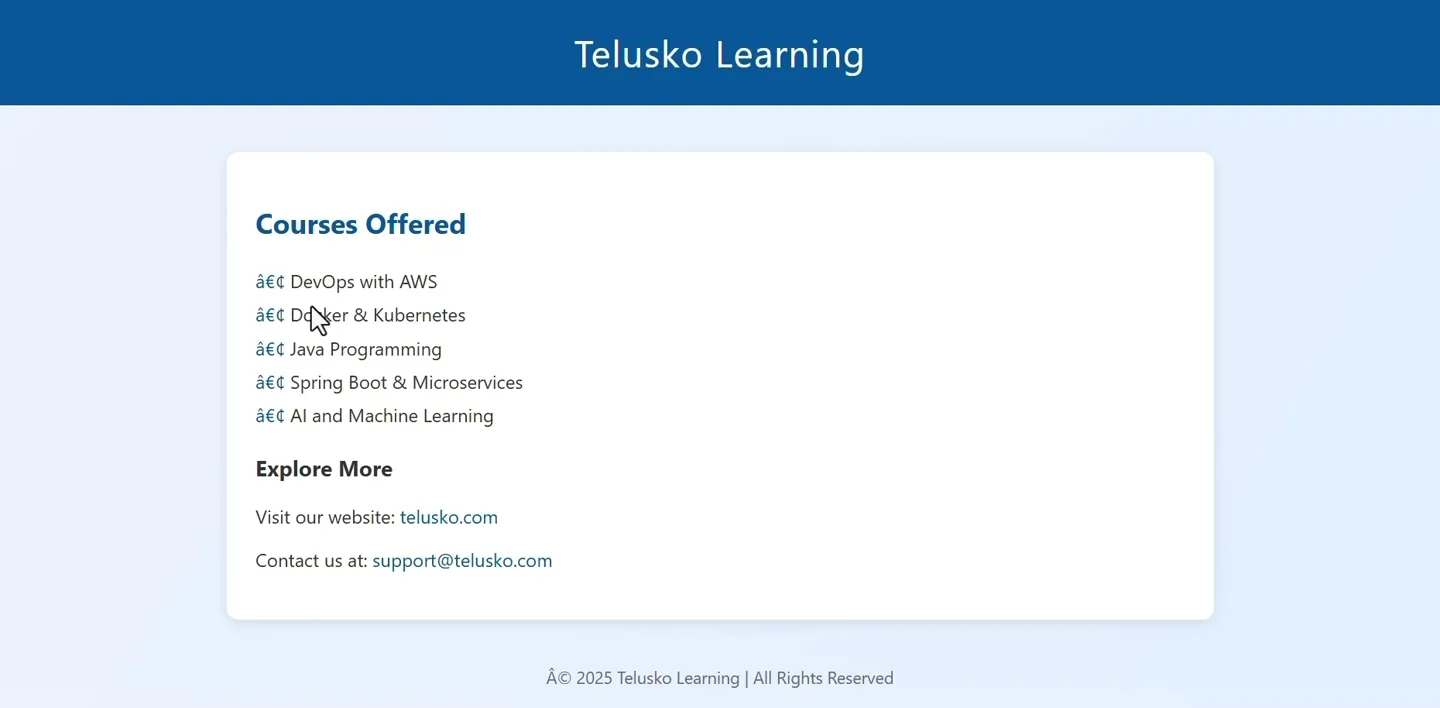
The application running on EKS, opened through the load balancer DNS name.
You may notice odd characters like • instead of bullet points. That is a character encoding issue in the sample JSP (it does not declare UTF-8), not a deployment problem. Adding <%@ page contentType="text/html; charset=UTF-8" pageEncoding="UTF-8" %> at the top of index.jsp fixes it.
Hard-coding files in the pipeline
The lecture is open about this: writing the Dockerfile and the manifests inside the Jenkinsfile works, but it is not how real projects do it. The developers who own the application should own its Dockerfile and manifests, version them in Git next to the code, and review changes in pull requests. The pipeline should only run them. That is exactly what the next lesson changes.
Clean up
At the end of the lecture the Jenkins server is cleaned with sudo docker system prune and the job workspaces are wiped (job page > Workspace > Wipe Out Current Workspace, as in earlier lessons).
The load balancer costs money
The web-app-service created a real AWS load balancer, billed per hour on top of the EKS cluster. When you finish practising, delete the Service before deleting the cluster, otherwise the load balancer can block the VPC from being deleted and keep charging you:
kubectl delete svc web-app-service
kubectl delete deployment web-app-deployment
Then delete the cluster as shown in Creating Your First EKS Cluster, unless you continue straight to the next lesson.
Common errors
Try It Yourself
- Run the complete pipeline and open the app through the load balancer DNS name.
- Run it again and watch
kubectl get pods -won the EKS home server. Notice the new pods (new hash in their names) replacing the old ones. - Change
replicas: 2to3, run the pipeline, and confirm a third pod appears. - Change the image tag in the manifest to one that does not exist, run the pipeline, and see
rollout statusfail the build while the old pods keep serving. - Delete the Service and Deployment with kubectl and check in the EC2 console that the load balancer disappears.
Official references
- Kubernetes: kubectl apply
- Kubernetes: kubectl rollout status
- Kubernetes: Service type LoadBalancer
- Amazon EKS: Associate access policies with access entries
Written By: Shramik Masti
How is this guide?
Last updated on
Build & Push Docker Images Using Jenkins Pipeline
Write a pipeline that clones a Java web app, builds the WAR with Maven, builds a Docker image, and pushes it to Docker Hub using a Jenkins credential and an access token.
CI CD Pipeline with Jenkins, Docker & Kubernetes
Build the real end-to-end pipeline where the Dockerfile and Kubernetes manifest live in Git with the code, and every build rolls out a uniquely tagged image to Amazon EKS.