
Building Your First Java Application with Jenkins
Configure Maven as a Jenkins tool, create a freestyle job that clones a Spring Boot project from GitHub and runs Maven, then find the generated WAR file in the workspace.
Printing messages proved that Jenkins runs commands. Now let us give it real work. When a developer pushes code to GitHub, we want Jenkins to fetch that code, build it with Maven, and produce the deployable file, without anyone typing a command.
Developer -> git push -> GitHub -> Jenkins clones the repo -> Maven compiles, tests, packages -> springbootmvnapp-0.0.1-SNAPSHOT.warJenkins does not know how to compile Java. It talks to two other tools: Git to fetch the code, and Maven to build it. So first we make sure both are available.
Step 1: check Git and the JDK on the Jenkins server
SSH into the Jenkins server and check:
git --version      # git version 2.43.0 on Ubuntu 24.04
java --version     # the Java runtime
javac --version    # the Java compiler. Maven needs this one
Ubuntu 24.04 on EC2 already has Git. If not, install it with sudo apt install -y git.
javac is the important one. Jenkins itself only needs a Java runtime (JRE), but compiling Java code needs a full JDK. If javac is "command not found", install the JDK:
sudo apt install -y openjdk-21-jdk-headless
javac --version    # javac 21.0.x
Without it, the Maven build fails with "No compiler is provided in this environment. Perhaps you are running on a JRE rather than a JDK?"
Match the JDK to the project
The demo project is Spring Boot 3.5, which needs Java 17 or newer, so Java 21 is fine. If a project needs a different Java version, install that JDK too and register it under Manage Jenkins > Tools > JDK installations, then pick it in the job.
Step 2: register Maven as a Jenkins tool
Go to Manage Jenkins > Tools, scroll to Maven installations and click Add Maven:
| Field | Value | Meaning |
|---|---|---|
| Name | maven | The name jobs use to refer to this installation |
| Install automatically | Checked | Jenkins downloads Maven itself the first time a job needs it |
| Install from Apache: Version | Latest offered (3.9.16 in the demo) | Which Maven release to download |
Click Save. You did not install Maven on the server with apt. Jenkins downloads it into /var/lib/jenkins/tools/ on the first build that uses it. That is why the very first build takes a few minutes.
Step 3: create the job
Click + New Item, name it java-app-build, choose Freestyle project, click OK, and add the description Java application build job.
Source Code Management
Select Git and fill in:
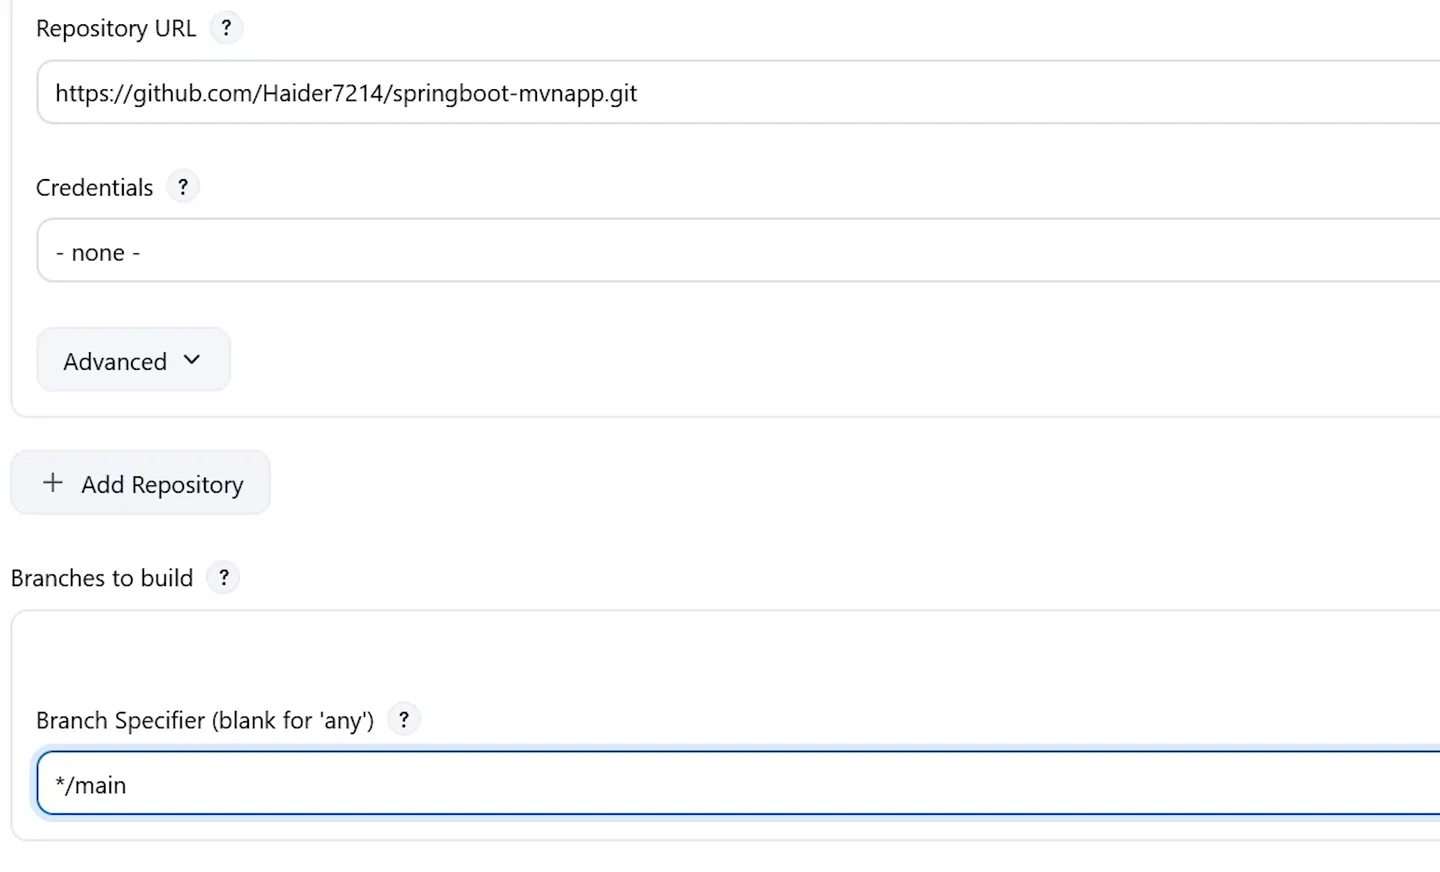
The Git section of the job: repository URL, credentials and the branch to build.
| Field | Value | Notes |
|---|---|---|
| Repository URL | https://github.com/Haider7214/springboot-mvnapp.git | The public demo project. You can fork it and use your fork |
| Credentials | - none - | Public repositories need none. A private repository needs a credential (a GitHub username plus a personal access token) |
| Branch Specifier | */main | The default is */master. GitHub now names the default branch main, so change it or the build fails |
If the branch is wrong, the console shows Couldn't find any revision to build. Verify the repository and branch configuration for this job. That message nearly always means the branch specifier does not match.
Build Steps
Click Add build step > Invoke top-level Maven targets:
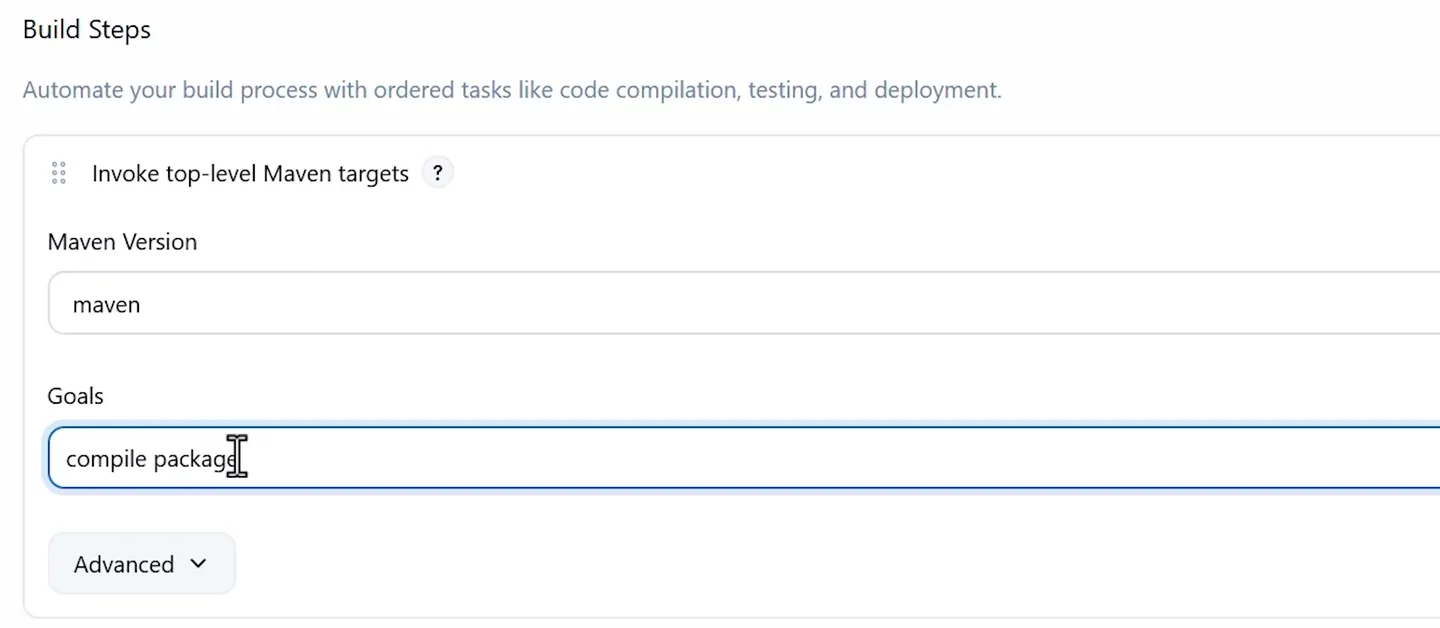
The Maven build step uses the maven tool we registered and runs the goals compile package.
| Field | Value |
|---|---|
| Maven Version | maven (the name from Step 2) |
| Goals | compile package |
Maven runs lifecycle phases in order, so package already includes validate, compile and test. Writing compile as well is harmless but not needed. A more common choice in real jobs is clean package, which first deletes the old target folder so a stale file from an earlier build can never sneak into the result. See Maven Goals if you want a refresher.
Click Save.
Step 4: build and read the log
Click Build Now. The first run takes longer because Jenkins downloads Maven and Maven downloads all the project dependencies into /var/lib/jenkins/.m2/repository. Later builds reuse that cache and take seconds.
Open the build's Console Output and look for these milestones:
Cloning repository https://github.com/Haider7214/springboot-mvnapp.git
Checking out Revision 3f2a... (refs/remotes/origin/main)
Unpacking https://repo.maven.apache.org/.../apache-maven-3.9.16-bin.zip to /var/lib/jenkins/tools/hudson.tasks.Maven_MavenInstallation/maven
[INFO] --- compiler:3.14.1:compile (default-compile) @ springbootmvnapp ---
[INFO] Tests run: 1, Failures: 0, Errors: 0, Skipped: 0
[INFO] --- war:3.4.0:war (default-war) @ springbootmvnapp ---
[INFO] Building war: /var/lib/jenkins/workspace/java-app-build/target/springbootmvnapp-0.0.1-SNAPSHOT.war
[INFO] BUILD SUCCESS
Finished: SUCCESS
Exact plugin versions and the commit hash will differ on your machine.
Step 5: find the WAR file
On the server:
cd /var/lib/jenkins/workspace/java-app-build
ls
# mvnw  mvnw.cmd  pom.xml  src  target
cd target
ls
# springbootmvnapp-0.0.1-SNAPSHOT.war   springbootmvnapp-0.0.1-SNAPSHOT.war.original  classes  surefire-reports ...
The .war file is the finished build. From here it could be deployed to Tomcat, or copied into a Docker image and deployed to Kubernetes, which is exactly what the end-to-end section does. The .war.original file is the plain WAR before the Spring Boot plugin repackaged it into an executable one.
Nobody ran git clone or mvn package by hand. Jenkins did it.
Keep the artifact (better than digging in the workspace)
Going into the workspace over SSH is fine for learning. In real jobs, add a post-build action so Jenkins keeps the file with the build:
Add post-build action > Archive the artifacts, Files to archive: target/*.war
The WAR then appears as a download link on the build page, and it stays even after the workspace is cleaned.
Cleaning up workspaces on a small server
Every job keeps its workspace, and Maven builds are not small. At the end of the video the workspaces are deleted to free space:
sudo rm -rf /var/lib/jenkins/workspace/*This is fine on a practice server, but do not do it on a shared Jenkins while builds are running. Safer options:
- On the job page, use Workspace > Wipe Out Current Workspace for one job.
- In the job, under Environment, tick Delete workspace before build starts (from the Workspace Cleanup plugin) when a job must always start fresh.
- Under General, tick Discard old builds and keep, for example, the last 10 builds, so logs and archived files do not grow forever.
One small server does everything right now
Jenkins, its builds and the Maven cache all live on the same small EC2 instance. Several builds at once can slow it down a lot. This is the problem that agents solve, which we cover in Security & Distributed Builds.
Common errors
| Console message | Cause | Fix |
|---|---|---|
Couldn't find any revision to build | Branch specifier does not match | Use */main (or the real branch name) |
No compiler is provided in this environment | Only a JRE installed | sudo apt install -y openjdk-21-jdk-headless |
mvn: not found in an Execute shell step | Maven tool not on the PATH for shell steps | Use the Invoke top-level Maven targets step, or install Maven with apt |
Authentication failed on clone | Private repository without credentials | Add a GitHub token as a credential and select it |
Tests run: ..., Failures: 1 and BUILD FAILURE | A unit test failed | Fix the code. Do not skip tests to make the build green |
Try It Yourself
- Fork
springboot-mvnappto your GitHub account and point the job to your fork. - Change the goals to
clean packageand confirm the log showsmaven-clean-plugindeletingtarget. - Add the Archive the artifacts post-build action for
target/*.warand download the WAR from the build page. - Break a test in your fork (change an assertion), push, build, and read the failure in the console output. Then fix it.
- Enable Discard old builds with "Max # of builds to keep" set to 5 and run the job six times.
Official references
Written By: Shramik Masti
How is this guide?
Last updated on
Creating Your First Jenkins Freestyle Job
Understand what a Jenkins job is, create a freestyle project that runs shell commands, read its console output and find the files it created in the workspace.
Jenkins Build Triggers
Start Jenkins jobs automatically with Build periodically, Poll SCM and GitHub webhooks, write Jenkins cron expressions with the H symbol, and choose the right trigger for each job.