
Jenkins Installation and Initial Setup
Launch an Ubuntu 24.04 EC2 instance, install Java 21 and the Jenkins LTS from the official repository, open port 8080, enter the initial admin password and finish the setup wizard.
Jenkins is a Java web application that runs as a service on a server. So installing it is really three jobs: get a server, put Java and Jenkins on it, and make its web port reachable from your browser. We will do all three on an Ubuntu machine in AWS, so the steps are identical whatever laptop you use.
Step 1: launch the EC2 instance
In the AWS console, search for EC2, open it and click Launch instance. Use these settings:
| Setting | Value used in the demo | Why |
|---|---|---|
| Name | Jenkins server | Only a label for you |
| AMI | Ubuntu Server 24.04 LTS | Long-term support release, uses apt |
| Instance type | c7i-flex.large (2 vCPU, 4 GiB), marked free tier eligible in the demo account. t3.small (2 GiB) also works for practice | Jenkins plus a Maven build needs more memory than a micro instance has |
| Key pair | Create new: jenkins-key-pair, RSA, .pem | Your private key for SSH. It downloads once |
| Security group | Create new, allow SSH (port 22) | You need SSH now, and port 8080 a little later |
| Storage | Default 8 GiB is fine for practice, 20 GiB or more is more comfortable | Build workspaces and Docker images fill disks quickly |
Click Launch instance and wait until the state shows Running.
Do not go too small
A t3.micro has 1 GiB of memory. Jenkins itself is happy with that, but the moment a Maven build runs next to it, the server may freeze or the build may be killed. Pick at least 2 GiB, and stop the instance whenever you are not practising. Free tier eligibility depends on your account and region, so always check the label in your own console.
Step 2: connect over SSH
Move the downloaded .pem file to a folder you will remember (for example a key-pairs folder), open Git Bash or a terminal in that folder, and use the command shown under Connect > SSH client in the console:
chmod 400 "jenkins-key-pair.pem"
ssh -i "jenkins-key-pair.pem" ubuntu@<public-ip-or-dns>
The default user on Ubuntu AMIs is ubuntu. Type yes the first time to trust the host. If you need help with this step, see Connecting to EC2 Instance Using Git Bash.
Step 3: install Java and Jenkins
In the video, the commands came from an AI assistant. That is fine for a first draft, but always compare them with the official Jenkins documentation, because Jenkins changes its repository signing key over time. The commands below follow the official Debian/Ubuntu instructions for the LTS (long-term support) line.
# 1. Refresh the package list
sudo apt update

# 2. Install Java 21 (headless runtime, no GUI parts) and fontconfig
sudo apt install -y fontconfig openjdk-21-jre-headless
java -version

# 3. Add the Jenkins repository signing key
sudo wget -O /etc/apt/keyrings/jenkins-keyring.asc \
  https://pkg.jenkins.io/debian-stable/jenkins.io-2026.key

# 4. Add the Jenkins LTS (stable) repository
echo "deb [signed-by=/etc/apt/keyrings/jenkins-keyring.asc]" \
  https://pkg.jenkins.io/debian-stable binary/ | sudo tee \
  /etc/apt/sources.list.d/jenkins.list > /dev/null

# 5. Install Jenkins
sudo apt update
sudo apt install -y jenkins

# 6. Start Jenkins now and on every boot, then check it
sudo systemctl enable jenkins
sudo systemctl start jenkins
sudo systemctl status jenkins
What each part does:
| Command / part | Meaning |
|---|---|
openjdk-21-jre-headless | Java 21 runtime without desktop libraries. Jenkins only needs a runtime, not a full JDK |
fontconfig | Font libraries Jenkins uses to draw some images (graphs, charts). Missing it causes odd errors later |
jenkins.io-2026.key | The key that proves the packages really come from the Jenkins project. The file name changes when the project rotates its key |
/etc/apt/keyrings/ | Where third-party keys go on modern Ubuntu. apt-key is deprecated |
signed-by=... | Tells apt to trust this key for this repository only |
debian-stable | The LTS repository. Plain debian is the weekly release line |
systemctl enable | Start the service automatically after a reboot |
The status output should show active (running). Press q (or Ctrl+C) to get your prompt back.
Which Java does Jenkins need in 2026?
Jenkins LTS 2.555.1 and newer (the current LTS is 2.580.1, released 30 September 2026) runs on Java 21 or Java 25 only. Java 17 was supported up to the 2.541.x line and is no longer accepted. Older tutorials that install openjdk-17 or openjdk-11 will give you a Jenkins that refuses to start. If apt install jenkins pulled a version that complains about Java, check java -version first.
If you prefer the latest features every week, use the weekly repository (https://pkg.jenkins.io/debian) instead. For learning and for company servers, LTS is the right choice.
Step 4: open port 8080
Jenkins listens on port 8080 by default. Your security group only allows SSH so far, so the browser cannot reach it yet.
- In the EC2 console, select the instance and open the Security tab.
- Click the security group, then Edit inbound rules.
- Add rule: type Custom TCP, port 8080, source My IP.
- Click Save rules.
In the video, the rules are opened to "Anywhere" (and even "All traffic") to keep things simple. That works, but it exposes your Jenkins login page to the whole internet, and bots scan for open Jenkins servers constantly. Use My IP for 8080. You will open it wider only when GitHub webhooks need to reach Jenkins, in Jenkins Build Triggers.
Step 5: enter the initial admin password
Open http://<public-ip>:8080 in the browser. The first page asks for an administrator password that Jenkins generated during installation.
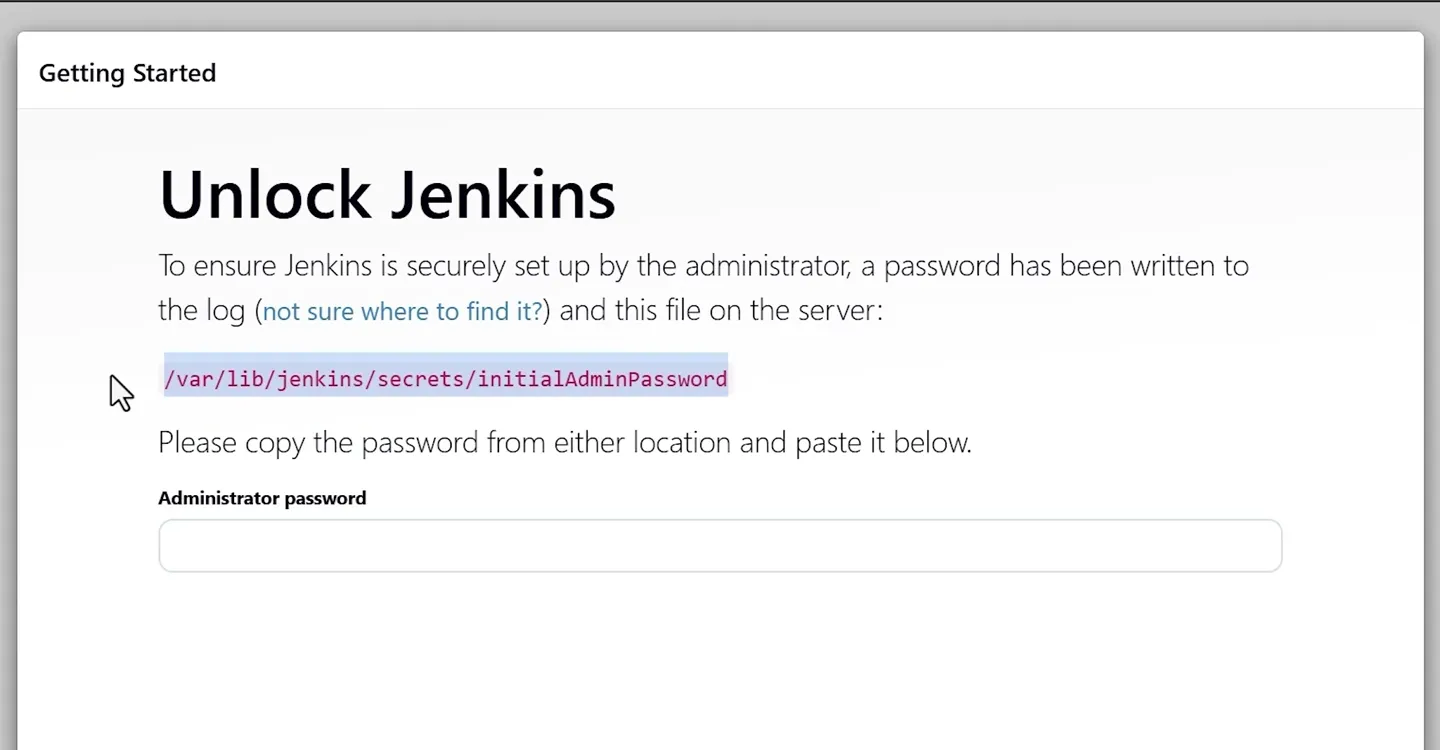
The first Getting Started screen shows the path of the file that holds the one-time admin password.
Read the file on the server. It is owned by the jenkins user, so plain cat fails with "Permission denied" and you need sudo:
sudo cat /var/lib/jenkins/secrets/initialAdminPasswordCopy the long string, paste it into Administrator password and click Continue. Treat it like any password: do not paste it into chats or screenshots. After the setup wizard finishes, the file is no longer used.
Step 6: install the suggested plugins
Jenkins asks how to install plugins. Choose Install suggested plugins. It downloads a standard set, which takes two or three minutes.
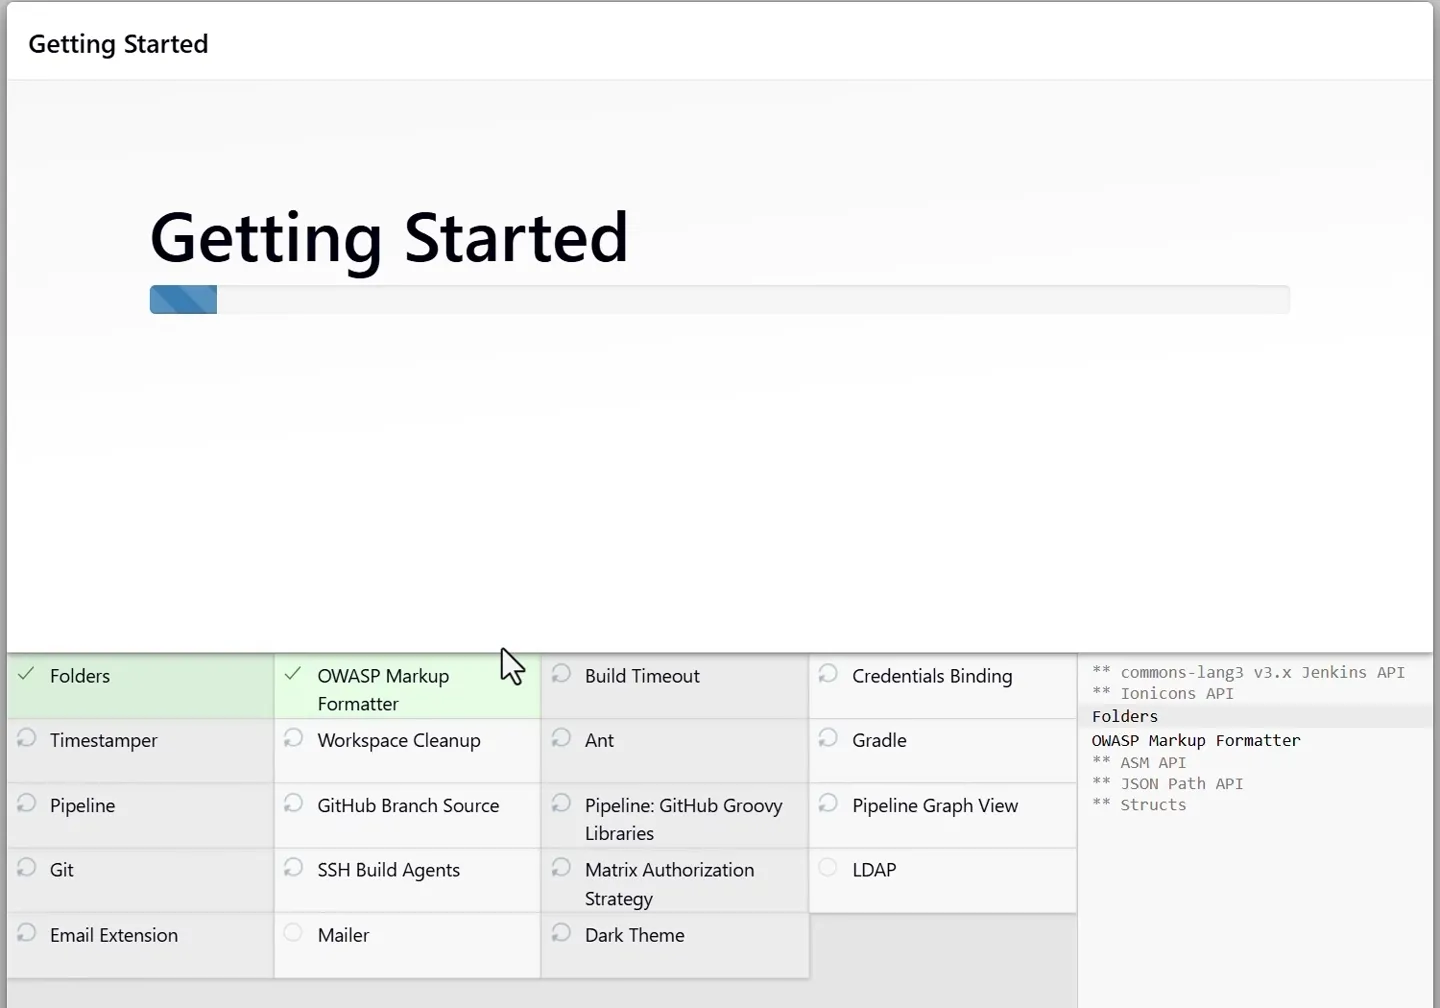
The suggested plugins being installed. Several of them are used later in this course.
You will meet many of these later:
| Plugin | Where we use it |
|---|---|
| Git, GitHub Branch Source | Fetching code from GitHub |
| Pipeline, Pipeline Graph View | Writing Jenkinsfile pipelines and seeing stages visually |
| Pipeline: GitHub Groovy Libraries | Shared libraries |
| SSH Build Agents, Credentials Binding | Agents over SSH, using secrets in jobs |
| Matrix Authorization Strategy | User permissions |
| Email Extension, Mailer | Email notifications |
| Timestamper, Workspace Cleanup, Build Timeout | Small quality-of-life tools for builds |
Step 7: create the first admin user
Fill in Username, Password, Full name and Email, then Save and Continue. Use a real password, not admin. This account has full control of Jenkins and of any credentials you store in it later.
The next screen, Instance Configuration, shows the Jenkins URL (http://<public-ip>:8080/). Keep it and click Save and Finish, then Start using Jenkins. You land on the dashboard with the "Welcome to Jenkins!" message.
The public IP changes after a stop
If you stop and start the instance, it gets a new public IP. Jenkins still works, but the Jenkins URL saved in its settings becomes wrong (links in emails will point to the old address). Update it under Manage Jenkins > System > Jenkins URL, or attach an Elastic IP to the instance.
Common problems
| Symptom | Likely cause | Fix |
|---|---|---|
| Browser keeps loading, then times out | Port 8080 not open in the security group, or you used https:// | Add the inbound rule, use http:// |
systemctl status jenkins shows failed | Wrong or missing Java version | java -version, install openjdk-21-jre-headless, then sudo systemctl restart jenkins |
NO_PUBKEY or signature error on apt update | Old key file from an outdated guide | Download the current key from the official page |
Permission denied reading the password | Missing sudo | sudo cat /var/lib/jenkins/secrets/initialAdminPassword |
| Server becomes very slow during builds | Not enough memory | Use an instance with at least 2 GiB, or add swap |
To see why Jenkins will not start, read its service log:
sudo journalctl -u jenkins --no-pager -n 50Stop the instance when you finish
Select the instance, then Instance state > Stop instance. Jenkins, its jobs and its settings live on the disk under /var/lib/jenkins, so everything is still there when you start it again. Only Terminate deletes them.
Try It Yourself
- Launch your own Ubuntu 24.04 instance and install Jenkins LTS with the commands above.
- Run
java -versionandjenkins --versionand note both versions. - Open port 8080 for My IP only. Then try the URL from your phone on mobile data and confirm it does not load.
- Enter the initial admin password, install the suggested plugins and create your admin user.
- Stop the instance, start it again, and log in using the new public IP.
Official references
Written By: Shramik Masti
How is this guide?
Last updated on
What is Jenkins: A Beginner's Guide
Understand what Jenkins is, what CI and CD mean, why a Java-based open source automation server works with any tech stack, and how the course lab is set up.
Jenkins Dashboard Overview
Tour the Jenkins dashboard and the Manage Jenkins page, and learn what New Item, Build History, the build queue, executors, tools, plugins, nodes, credentials and users are for.