
Git Branching
As a project grows, developers often need to work on multiple features, bug fixes, or experiments at the same time.
Git branching allows you to create separate lines of development so that work can happen independently without immediately affecting the main codebase.
What is a Branch?
A branch is a movable pointer to a commit that represents an independent line of development.
Suppose the project currently looks like this:
A --- B --- C
          ↑
         main
When you create a new branch from main, both branches initially point to the same commit:
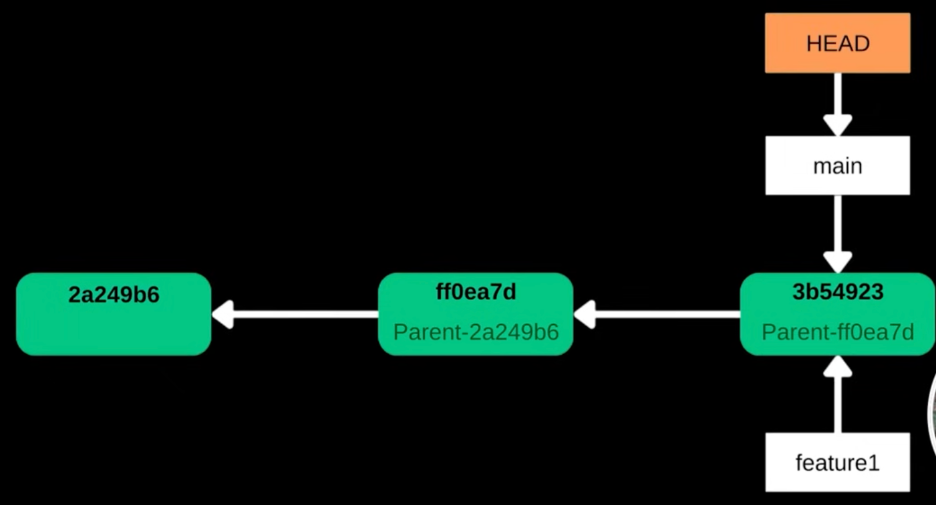
If you make commits on feature, only that branch moves forward:
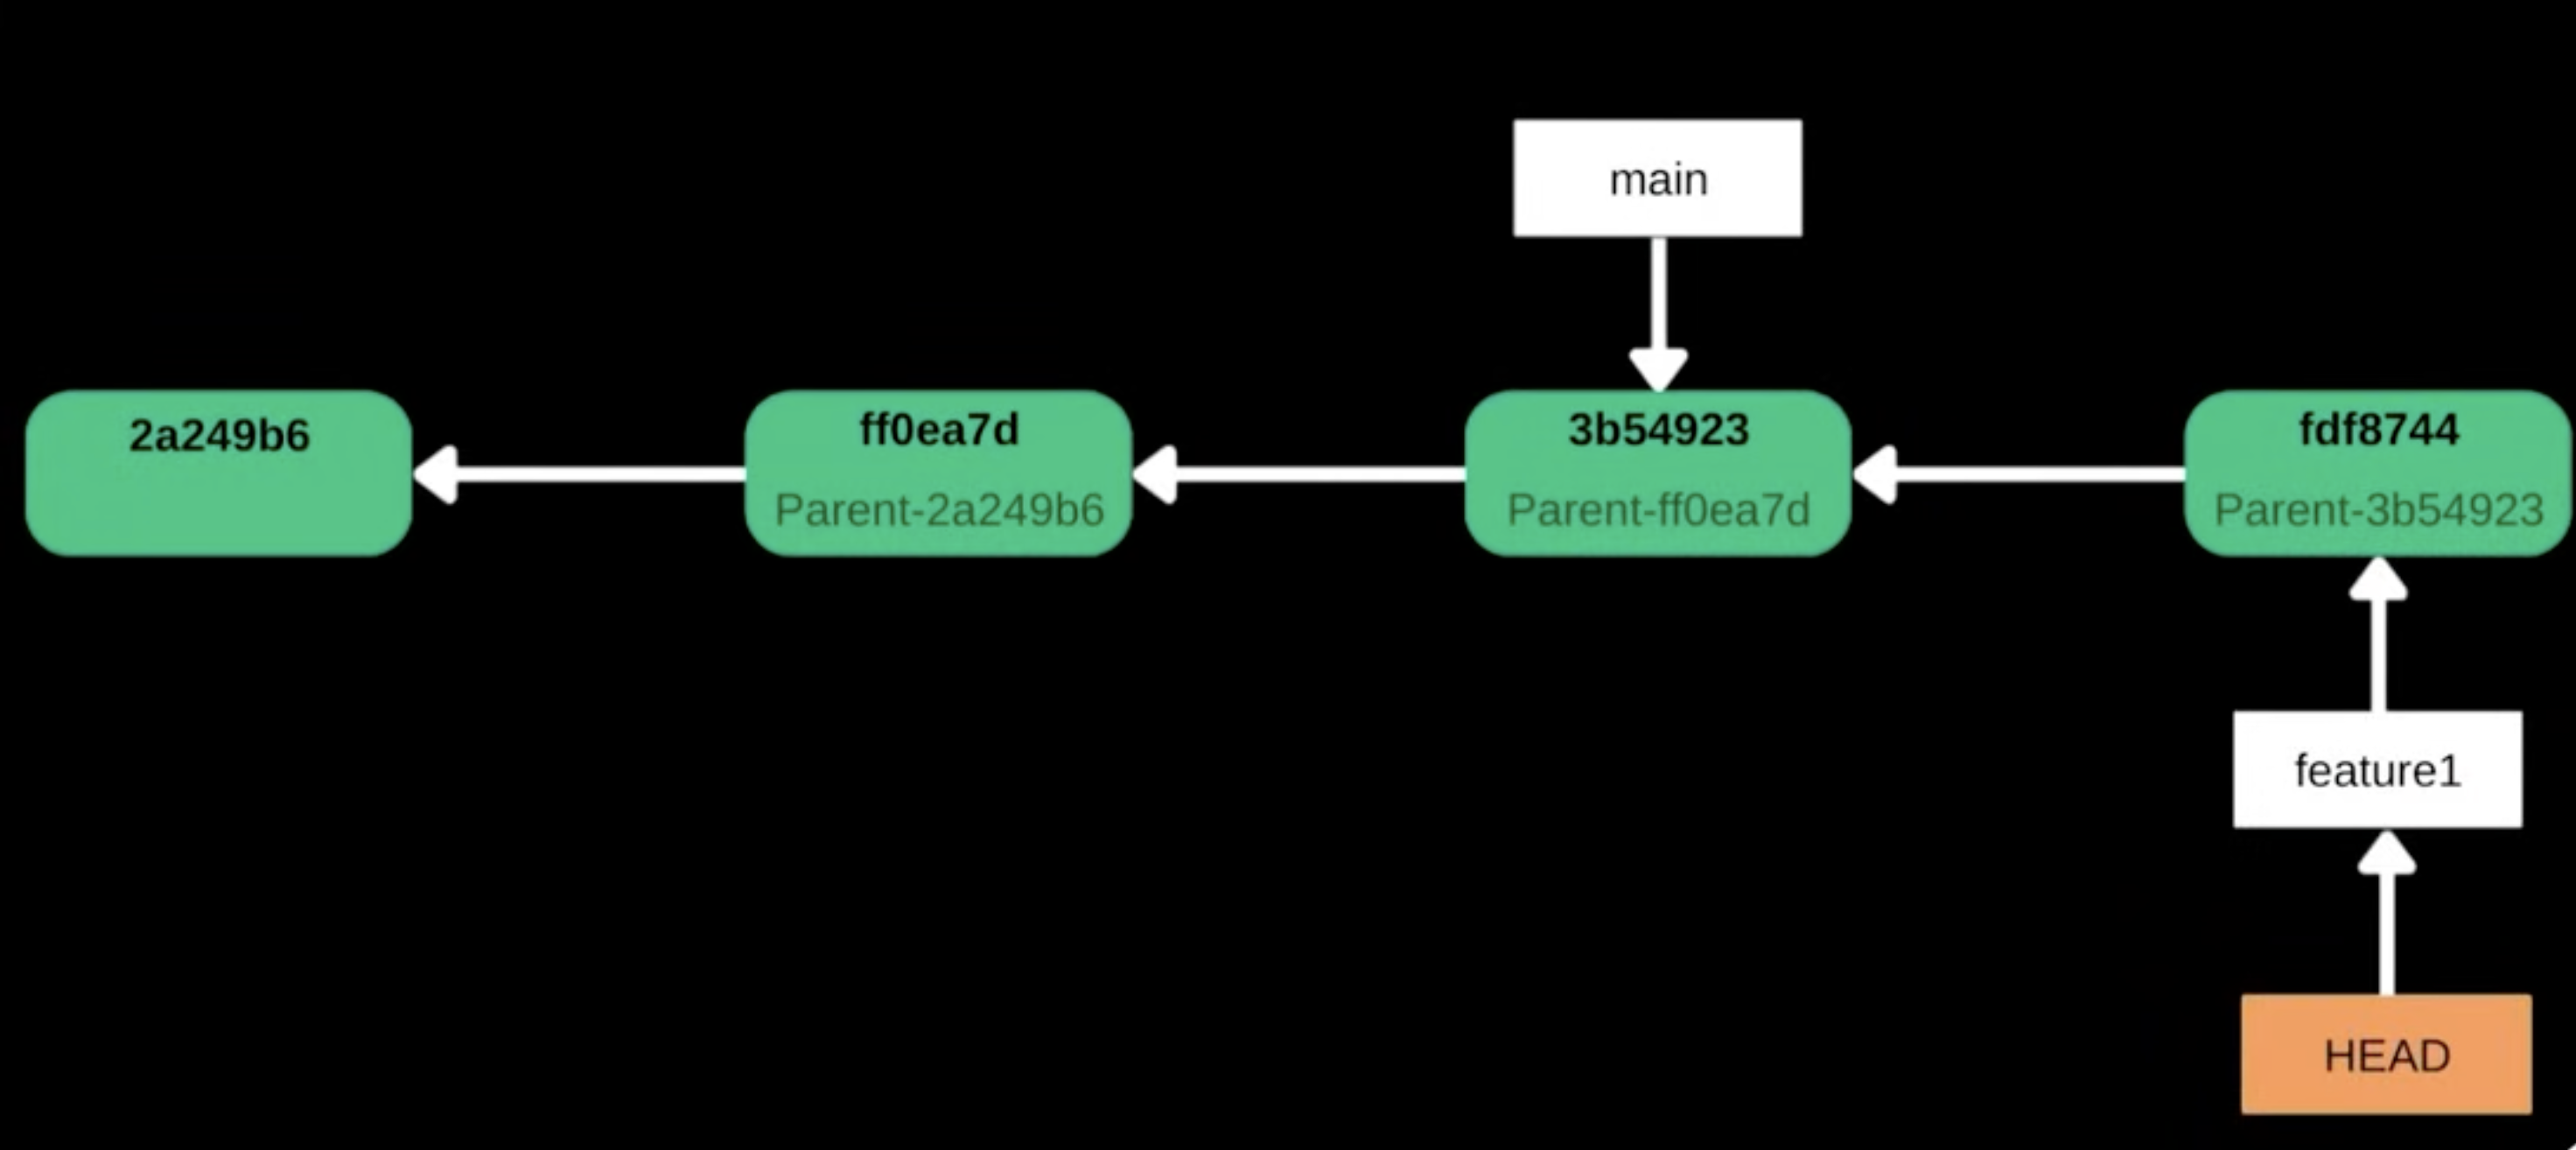
The main branch remains unchanged while the feature is being developed.
Key idea: A branch allows you to work on changes independently without disturbing another line of development.
Why Use Branches?
Branches are useful whenever different work needs to be developed separately.
Common examples include:
- Developing a new feature
- Fixing a bug
- Experimenting with an idea
- Preparing a release
- Working with multiple developers
For example:
main
 ├── feature-login
 ├── feature-payment
 └── bugfix-validation
Each branch can have its own commits and can later be merged back into another branch.
Viewing Branches
To list the branches in your local repository:
git branchExample:
  feature-login
* main
  bugfix
The * indicates the currently active branch.
To view both local and remote branches:
git branch --allExample:
* main
  feature-login
  remotes/origin/main
  remotes/origin/feature-login
Creating a Branch
Create a Branch Without Switching to it
You can create a branch without switching to it:
git branch feature-loginThis creates the branch but keeps you on the current branch.
To confirm:
git branchCreating and Switching to a Branch
A common workflow is to create a branch and immediately start working on it.
Using git switch
git switch -c feature-loginThe -c option means create a new branch and switch to it.
Using git checkout
Older Git workflows commonly use:
git checkout -b feature-loginBoth commands perform the same basic operation.
Prefer
git switchfor branch navigation because it makes the intention clearer.git checkoutis still widely used and you'll encounter it in existing projects.
Switching Between Branches
To move to an existing branch:
git switch feature-loginOr:
git checkout feature-loginFor example:
main
  ↓
git switch feature-login
  ↓
feature-login
Git changes your working directory to reflect the selected branch.
Switching to the Previous Branch
If you want to quickly return to the branch you were using before:
git switch -For example:
main
  ↓
switch to feature-login
  ↓
feature-login
  ↓
git switch -
  ↓
main
This is particularly convenient when moving back and forth between two branches.
Working on a Branch
Once you switch to a feature branch, your normal Git workflow continues as usual:
Create / Modify Files
        ↓
     git add
        ↓
    git commit
For example:
git switch -c feature-login

# Make changes...

git add .
git commit -m "Add login feature"
The new commit belongs to feature-login, not main.
A --- B --- C -------- main
          \
           D --- E --- feature-login
Branches and Commit History
A branch does not create a separate copy of your entire project.
Instead, Git uses branches as references to commits.
Consider:
A --- B --- C
          \
           D --- E
Here:
mainpoints toCfeature-loginpoints toE- Both branches share commits
A,B, andC
This is why creating branches in Git is lightweight and fast.
Pushing a Branch to GitHub
A newly created local branch is not automatically available on the remote repository.
To share it with your team, push it:
git push origin feature-loginAfter pushing:
Local feature-login
        │
        │ git push
        ▼
GitHub feature-login
The branch is now available on the remote repository.
Deleting a Branch
Once a feature has been completed and merged, the local branch can usually be deleted.
git branch -d feature-loginThe -d option performs a safe deletion and normally prevents deletion if Git detects that the branch contains unmerged commits.
If you intentionally want to delete a branch even though it contains unmerged commits:
git branch -D feature-loginUse
-Dcarefully because it can remove the branch reference to commits that have not been merged elsewhere.
Visualizing Branches
As projects develop, the commit history can become difficult to understand from a simple list.
You can visualize branches and merges using:
git log --graph --oneline --allExample:
* e52ab91 Add payment validation
* 8f31c22 Add payment service
| * 72ac911 Fix login validation
|/
* 41cd832 Add authentication
* 12ab453 Initial commit
This gives you a quick view of how branches diverged and where their commits were created.
Feature Branch Workflow
A common development workflow looks like this:
main
  │
  │ create branch
  ▼
feature/login
  │
  ├── commit
  ├── commit
  └── commit
        │
        ▼
      Push
        │
        ▼
      GitHub
        │
        ▼
   Review / Merge
        │
        ▼
       main
The important idea is that development happens independently first. The completed work can then be integrated into the main development line.
Quick Reference
| Command | Purpose |
|---|---|
git branch | List local branches |
git branch --all | List local and remote branches |
git branch <name> | Create a branch |
git switch -c <name> | Create and switch to a branch |
git checkout -b <name> | Create and switch using the older command |
git switch <name> | Switch to an existing branch |
git switch - | Switch to the previous branch |
git branch -d <name> | Safely delete a local branch |
git branch -D <name> | Force-delete a local branch |
git push origin <name> | Push a branch to the remote |
git log --graph --oneline --all | Visualize branch and commit history |
Written By: Muskan Garg
How is this guide?
Last updated on