
Terraform Installation on Linux VM on AWS
Launch an Amazon Linux EC2 instance, connect to it over SSH from Git Bash, and install Terraform from the official HashiCorp repository.
Every learner has a different laptop. Some use Windows, some use a Mac, some have a company machine where installing software needs approval. A Linux virtual machine on AWS removes all of that. Everyone gets the same operating system, the same package manager and the same commands, so what you see in the lecture is exactly what you see on your screen.
That is the approach in this lesson. We create one small Linux machine on AWS, connect to it, and install Terraform on it. If you prefer to work on your own Windows laptop, the next lesson covers that. You only need one of the two.
You need an AWS account for this. If you do not have one yet, follow Creating an AWS Account first. A free tier account is enough for the whole Terraform course.
Step 1: Launch the Linux VM
Open EC2 and click Launch instance
In the AWS console, search for EC2, open it, and click Launch instance. Check the region in the top right corner first. Pick the region closest to you (for example ap-south-1, Mumbai) and use the same one for the whole course.
Name and image
Give the instance a name such as terraform-vm. Under Application and OS Images, choose Amazon Linux (Amazon Linux 2023 is the current default).
Instance type
Keep a free tier eligible type, for example t2.micro or t3.micro, depending on what your region shows as free tier eligible. Terraform itself is a small program and does not need a big machine.
Key pair
Click Create new key pair, give it a name such as terraform-keypair, keep the type RSA and the format .pem, and create it. The .pem file downloads to your machine. This is the private key that proves who you are when you connect, so keep it safe. AWS does not let you download it again.
Security group
Let the wizard create a new security group that allows SSH (port 22). For a practice machine, choose My IP as the source instead of Anywhere so only your network can attempt to log in.
Launch
Click Launch instance, then open the instance list and wait until the Instance state shows Running and the status checks pass.
If EC2 is new to you, the AWS course explains each of these choices in Introduction to EC2.
Step 2: Connect over SSH
Select your instance and click Connect, then open the SSH client tab. AWS shows you the exact commands for your instance. You can use any SSH tool (MobaXterm and PuTTY also work), but Git Bash on Windows, or the normal Terminal on macOS and Linux, is the simplest because the commands are the same everywhere.
Open Git Bash in the folder where the .pem file was downloaded (usually Downloads), then run:
chmod 400 terraform-keypair.pem
ssh -i "terraform-keypair.pem" ec2-user@<your-instance-public-dns>| Part | Meaning |
|---|---|
chmod 400 | Makes the key readable only by you. SSH refuses keys that other users can read |
ssh -i <file> | Use this private key file to log in |
ec2-user | Default user on Amazon Linux. On Ubuntu AMIs it is ubuntu |
<your-instance-public-dns> | The public DNS name or public IP shown on the Connect page |
The first time, SSH asks whether you trust the host. Type yes. Then check where you are:
whoami    # ec2-user
pwd       # /home/ec2-user
You are now inside the Linux machine on AWS.
Step 3: Install Terraform
Do not download Terraform from random websites. Go to the official install page at developer.hashicorp.com/terraform/install, scroll to Linux, and pick the tab that matches your distribution. We chose Amazon Linux, so we use that tab.
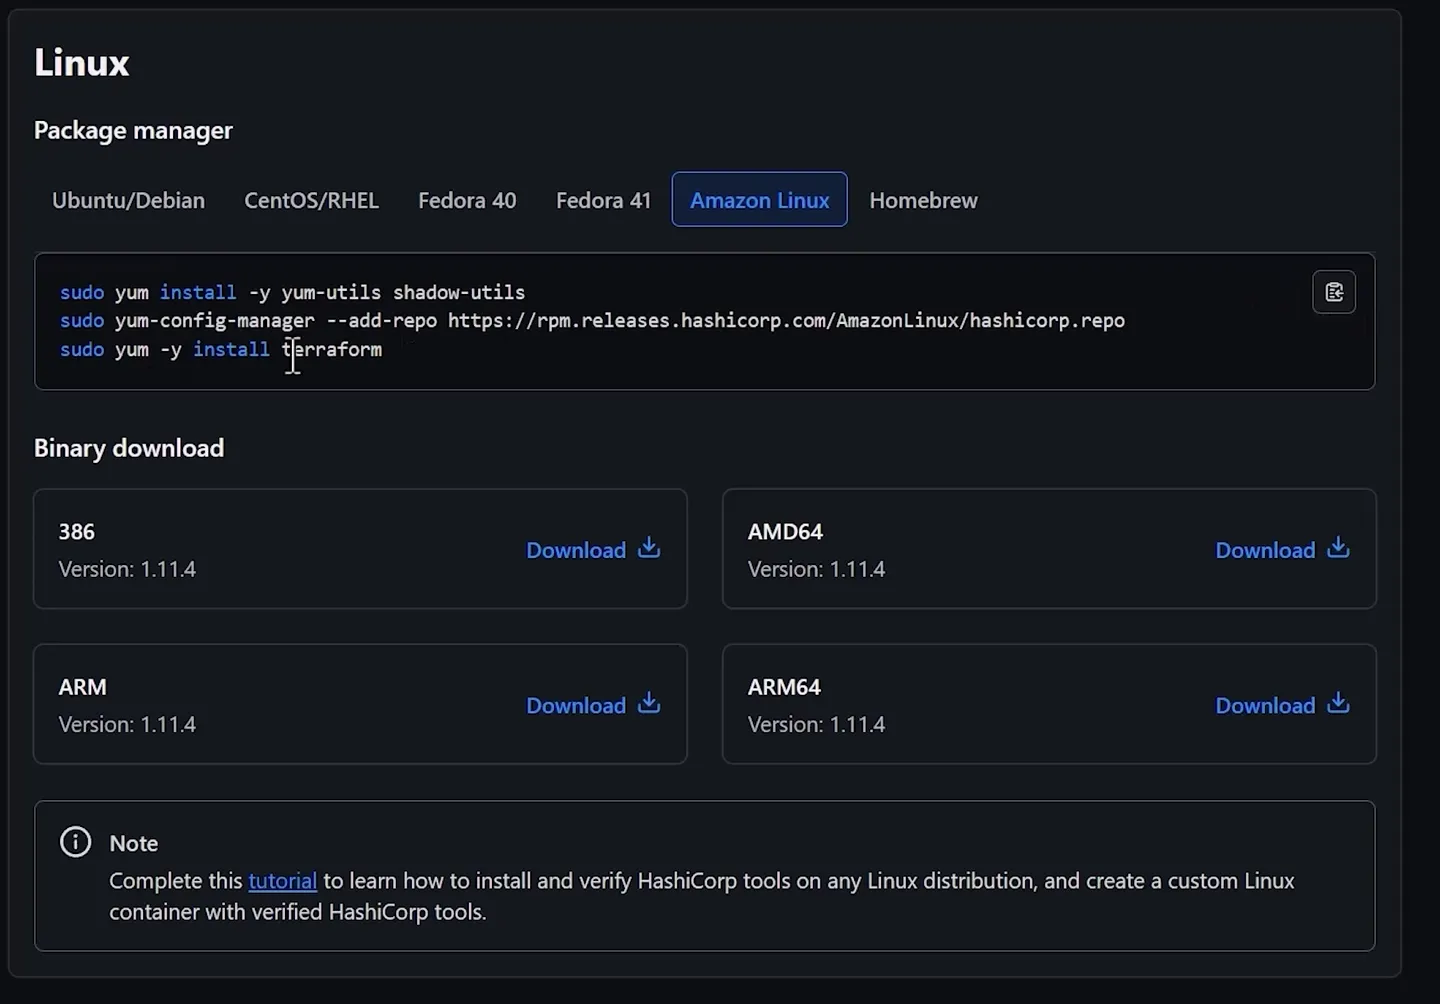
The official install page, Linux section, with the Amazon Linux tab selected.
Copy the commands and run them on the VM. The Amazon Linux tab is what we use in the lecture. The Ubuntu tab is there in case you picked an Ubuntu AMI instead.
sudo yum install -y yum-utils shadow-utils
sudo yum-config-manager --add-repo https://rpm.releases.hashicorp.com/AmazonLinux/hashicorp.repo
sudo yum -y install terraform
wget -O - https://apt.releases.hashicorp.com/gpg | sudo gpg --dearmor -o /usr/share/keyrings/hashicorp-archive-keyring.gpg
echo "deb [arch=$(dpkg --print-architecture) signed-by=/usr/share/keyrings/hashicorp-archive-keyring.gpg] https://apt.releases.hashicorp.com $(grep -oP '(?<=UBUNTU_CODENAME=).*' /etc/os-release || lsb_release -cs) main" | sudo tee /etc/apt/sources.list.d/hashicorp.list
sudo apt update && sudo apt install terraform| Command | What it does |
|---|---|
yum install -y yum-utils shadow-utils | Installs yum-config-manager, the helper we need to add a repository |
yum-config-manager --add-repo ... | Adds the official HashiCorp package repository, so yum knows where Terraform lives |
yum -y install terraform | Downloads and installs Terraform from that repository. -y answers yes to the prompt |
On Amazon Linux 2023, yum is simply an alias for dnf, so both names work. Because Terraform now comes from a repository, updating later is a single command: sudo yum update terraform.
Step 4: Verify the installation
terraform -vTerraform v1.16.5
on linux_amd64terraform version prints the same thing. The lecture shows v1.11.4, which was current at recording time. You will see a newer number, and that is fine: everything in this course works on any recent Terraform 1.x release.
Two more commands worth running once:
terraform -help                   # list all subcommands
terraform -install-autocomplete   # tab completion for terraform commands (open a new shell after)
Step 5: Stop the VM when you finish
When your practice session is over, go back to EC2 > Instances, select terraform-vm, and choose Instance state > Stop instance.
- A stopped instance keeps its disk, so Terraform and your
.tffiles are still there next time. - You are not charged for compute while it is stopped, but the EBS disk is still billed if you go beyond the free tier storage.
- The public IP address usually changes after stop and start, so copy the new SSH command from the Connect page each time.
Next time, choose Instance state > Start instance, connect again the same way, and carry on.
Stop is not terminate
Stop pauses the machine and keeps the disk. Terminate deletes the instance and, by default, its root disk. Only terminate the VM when you have finished the whole course.
Try It Yourself
- Launch an Amazon Linux
t2.microort3.microinstance calledterraform-vmwith SSH allowed only from your IP. - Connect with
ssh -ifrom Git Bash or Terminal and runwhoamiandpwd. - Install Terraform using the official repository and confirm the version with
terraform -v. - Stop the instance, start it again, and reconnect. Confirm Terraform is still installed and note that the public IP changed.
Official references
Written By: Shramik Masti
How is this guide?
Last updated on
Why Terraform and What is Terraform
Understand the problems with creating cloud infrastructure by hand, why cloud specific automation is not enough, and how Terraform solves this with infrastructure as code.
Terraform Installation Locally on Windows
Download the Terraform binary for Windows, add it to the PATH environment variable, and set up VS Code with a project folder for writing Terraform code.