
Git Installation & Initial Configuration
Before you can start using Git, you need to install it and configure your identity. This is a one-time setup that allows Git to track who makes each commit and ensures your development environment is ready for version control.
Installing Git
The installation process varies slightly depending on your operating system, but once installed, Git works the same across all platforms.
Installing Git on macOS
Git is typically available through the Xcode Command Line Tools.
If you have already installed Xcode or its Command Line Tools, Git is likely ready to use without any additional installation.
To verify whether Git is installed, open the Terminal and run:
git --versionIf Git is installed, you'll see output similar to:
git version 2.50.1If Git is not installed, macOS will usually prompt you to install the Command Line Tools automatically.
Installing Git on Windows
Windows does not include Git by default, so you need to install it manually.
Step 1: Download Git
Visit the official Git website:
Choose Windows and download the latest installer.
Step 2: Install Git
Run the downloaded installer and follow the installation wizard.
For beginners, the default installation options are recommended, as they work well for most users.
The installer includes useful tools such as:
- Git
- Git Bash
- Git GUI
Step 3: Verify the Installation
After the installation is complete, open either Command Prompt, PowerShell or Git Bash.
Then execute:
git --versionExample output:
git version 2.50.1Seeing a version number confirms that Git has been installed successfully.
Understanding Git Configuration
Installing Git is only the first step.
Before making commits, Git needs to know who you are so it can attach your identity to every commit.
Git stores configuration information such as:
- Your name
- Your email address
- Default editor
- Preferred settings
- Aliases and other customizations
These settings can be configured globally (for all repositories) or locally (for a single repository).
1. Checking the Installed Git Version
The first command most developers run after installation is:
git --versionPurpose
- Confirms Git is installed correctly.
- Displays the currently installed version.
- Useful for troubleshooting installation issues.
2. Viewing Git Configuration
To see Git's available configuration options, use:
git config --listThis command displays information about Git's configuration system and the available configuration commands.
It is commonly used as the starting point when learning Git configuration.
3. Listing Global Configuration
Git allows you to view all globally configured settings using:
git config --global --listPurpose
Displays all global Git settings currently stored on your computer.
Typical output may include:
user.name=Muskan Garg
user.email=muskan@example.com
init.defaultBranch=main
These settings are automatically applied to every Git repository you create on your machine.
4. Setting Your Git Username
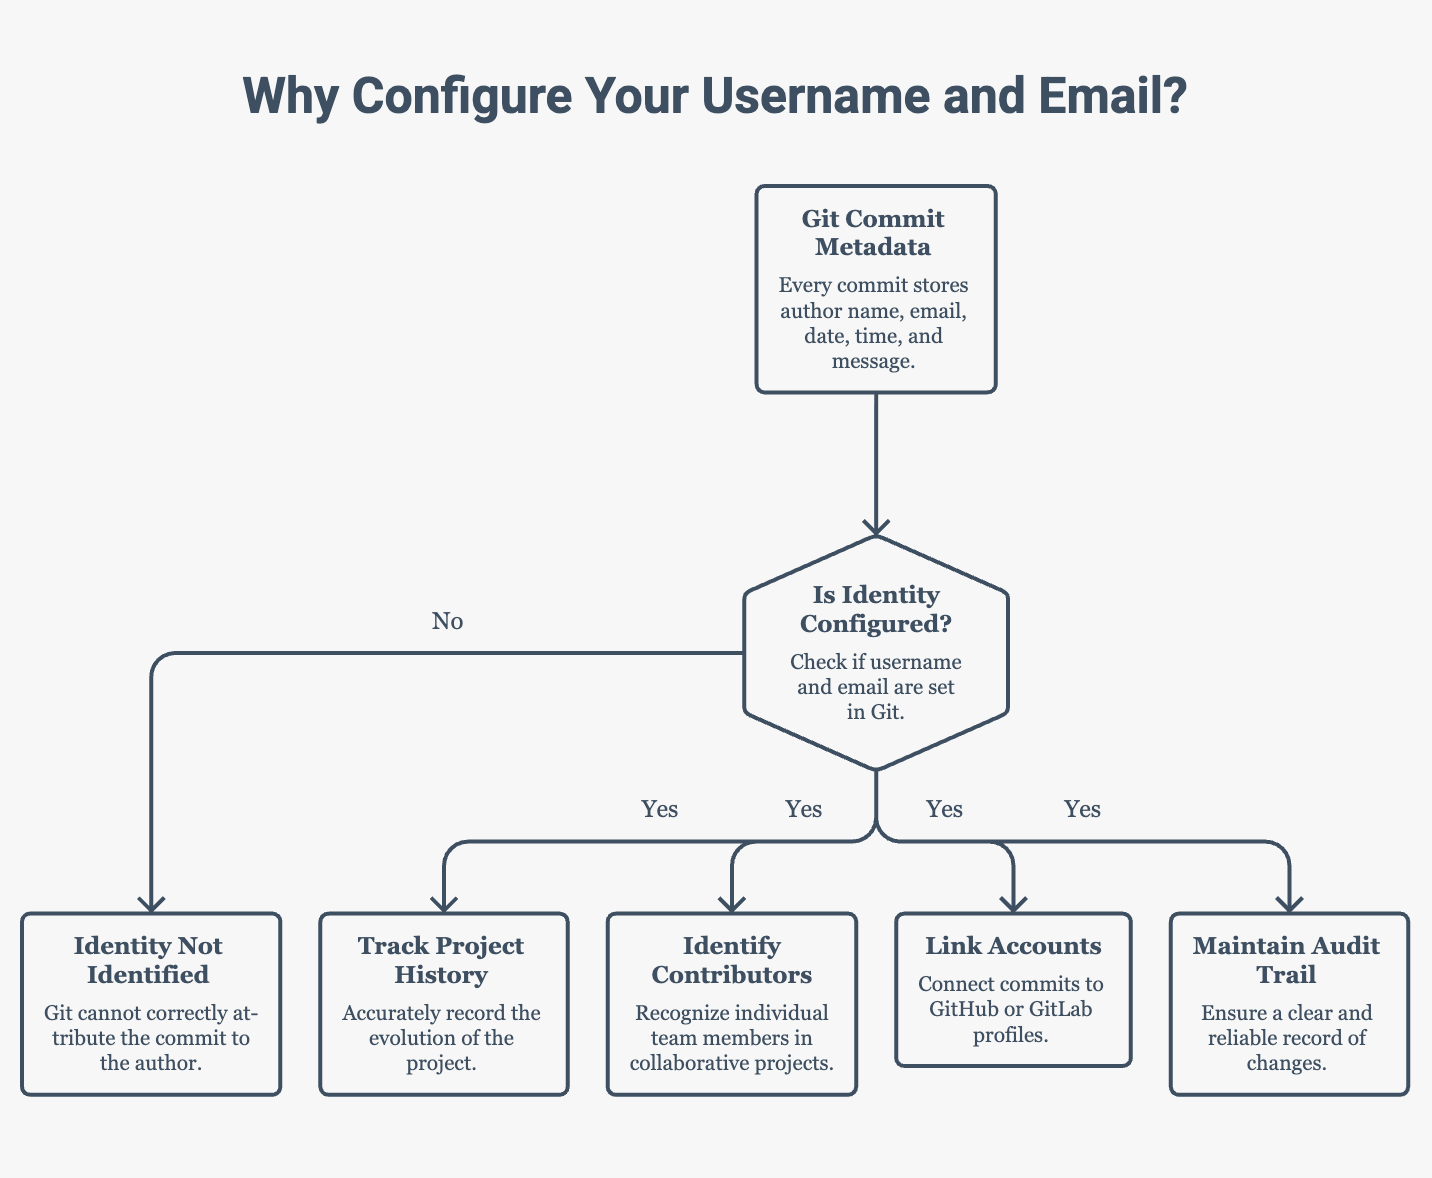
Every commit records the name of the person who made it.
To configure your name globally, run:
git config --global user.name "Your Name"Example
git config --global user.name "Muskan Garg"Why is this important?
Your configured name appears in the commit history.
Example:
Author: Muskan GargThis allows team members to identify who made each change.
5. Setting Your Git Email Address
Git also records the email address associated with every commit.
Configure it using:
git config --global user.email "your_email@example.com"Example
git config --global user.email "muskan@example.com"Why is this important?
Your email serves as your unique identity in Git.
Platforms like GitHub, GitLab, and Bitbucket use this email to associate commits with your account.
Example:
Author: Muskan Garg <muskan@example.com>If the configured email matches the one registered with your Git hosting platform, your commits will appear under your profile automatically.
Global vs Local Configuration
Git settings can be applied at different levels.
Global Configuration
git config --global- Applies to every Git repository on your computer.
- Typically used for your name and email.
- Configured only once.
Local Configuration
git config(without the --global flag, when executed inside a repository)
- Applies only to the current repository.
- Overrides global settings for that project.
- Useful when working on projects that require a different identity.
Example
Suppose you use:
- Personal GitHub account for personal projects
- Company GitHub account for office work
You can keep your personal identity globally and configure a different name and email only for your company's repository.
Common Git Setup Commands
| Command | Purpose |
|---|---|
git --version | Displays the installed Git version |
git config | Shows Git configuration information and available options |
git config --list | Lists all Git configuration settings (system, global, and local) |
git config --global --list | Lists all globally configured Git settings |
git config --local --list | Lists configuration settings for the current repository only |
git config --global user.name "Your Name" | Sets your username for all repositories |
git config --global user.email "your_email@example.com" | Sets your email address for all repositories |
git config --unset --global user.name | Removes the globally configured username |
git config --unset --global user.email | Removes the globally configured email |
git config --global init.defaultBranch "main" | Sets the default branch name for new repositories |
Summary
- Git must be installed before you can use version control.
- Use
git --versionto verify that Git has been installed successfully. - Git records the author's name and email with every commit.
- Global configuration applies to all repositories on your computer.
- Local configuration affects only the current repository and overrides global settings when needed.
- Setting the correct email helps platforms like GitHub associate your commits with your account.
Written By: Muskan Garg
How is this guide?
Last updated on