IDEs Installation
When developing software, programming goes beyond just writing code, it also involves debugging, documentation, testing, and deployment. To efficiently manage all these tasks, developers use IDEs (Integrated Development Environments).
Understanding IDEs
An IDE (Integrated Development Environment) is a unified workspace that combines code editing, debugging, testing, and execution tools in one place. It simplifies software development by reducing the need to switch between multiple applications.
Need for IDEs:
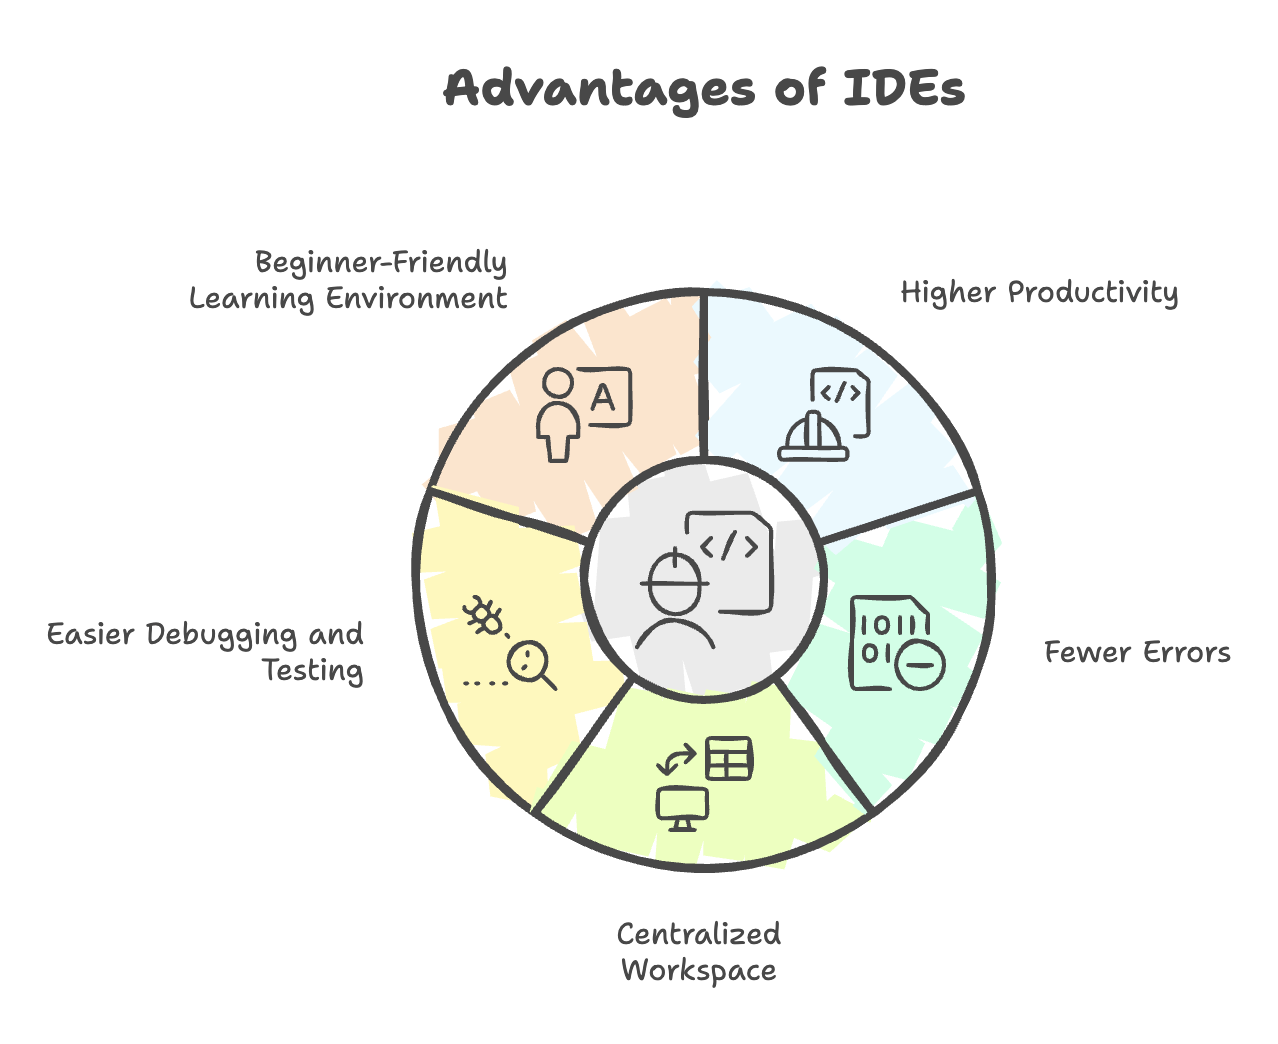
- Writing and managing large projects becomes easier.
- Offers syntax highlighting, auto-completion, and error detection.
- Provides debugging tools and integrated terminals for smooth execution.
- Supports version control (like Git) for collaboration and tracking changes.
Importance in Python Development:
- Speeds up coding with smart suggestions and linting.
- Enables one-click running and debugging.
- Keeps code organized and readable.
- Essential for large-scale or collaborative projects.
Core Components of IDE:
Editor, Interpreter, Debugger, Terminal, Project Explorer, and Version Control integration.
Popular IDEs for Python
1. Visual Studio Code (VS Code)
🔗 Download Link: https://code.visualstudio.com/
VS Code, developed by Microsoft, is one of the most popular and lightweight IDEs. It supports multiple languages (Python, JavaScript, C, Java, etc.) and can be customized with extensions.
To use Python in VS Code, install the Python Extension by Microsoft, which provides full support for Python syntax, linting, debugging, and code execution.
Steps to Install and Run Python in VS Code
-
Download and install VS Code for your OS (Windows/Mac).
-
Launch VS Code and install the Python extension from the Extensions Marketplace.
-
Create a new folder for your project and open it in VS Code.
-
Create a file named Demo.py.
-
Write your code:
print("Welcome to Telusko") -
Open the terminal (inside VS Code) and run the program:
python Demo.pyOutput:
Welcome to Telusko -
Alternatively, use the Run button to execute your script.
-
You can also customize themes, fonts, and layout according to your preference.
2. PyCharm (by JetBrains)
🔗 Download Link: https://www.jetbrains.com/pycharm/download/
PyCharm is a powerful IDE designed specifically for Python development by JetBrains. It comes in two editions:
- Community (Free) - Ideal for beginners.
- Pro (Paid) - Includes advanced features like web frameworks, database tools, and scientific libraries. JetBrains offers free educational licenses for students and teachers.
Steps to Install and Use PyCharm
-
Download and install PyCharm Community or Pro edition for your OS.
-
Launch PyCharm and create a new project (e.g.,
MyFirstProject). -
Choose a location for your project (e.g.,
C:\Users\YourName\PycharmProjects\MyFirstProject). -
Select your installed Python Interpreter.
-
PyCharm will create the project with an organized folder structure, Python Console, Terminal, and Version Control options.
-
Create a new Python file (e.g.,
Demo.py) and write:print("Hello") -
Click Run ▶️ - Output will appear in the console:
Hello
3. Jupyter Notebook
🔗 Access Link: https://jupyter.org/
Jupyter Notebook is an interactive web-based IDE widely used in Data Science, Machine Learning, and Artificial Intelligence. It allows you to write and execute Python code in cells, visualize data instantly, and add markdown notes for documentation. Jupyter can be used online or installed locally through Anaconda or pip.
Using Jupyter Notebook (Online Version)
-
Visit https://jupyter.org/.
-
Open the Jupyter Notebook interface.
-
Go to File → New Notebook.
-
Choose the Kernel → Python (Pyodide).
-
Write and execute:
print("Hello")Output:
Hello -
You can also add Markdown cells to include headings, notes, or explanations.
Conclusion
Choosing the right IDE depends on your use case:
- For general development → VS Code
- For professional, large-scale projects → PyCharm
- For data-driven and analytical work → Jupyter Notebook
Each IDE enhances productivity by integrating tools that make coding, debugging, and testing more efficient.
Written By: Muskan Garg
How is this guide?
Last updated on